Chocolate and salted caramel crepe cake

This is my 100th blog post. Whenever I’ve read other blogs in the past and they make a big deal about their 100th post, I haven’t really seen the point…but now that I’ve had this blog for a little while I certainly do. As anyone knows, keeping up a blog takes a large amount of work, and even one as amateur as this still requires a fair amount of time investment. I have had this blog for about 10 months now which means that on average I’ve actually been able to post more than twice a week to get to 100 posts, so I am pretty pleased about that. I get a lot of enjoyment out of cataloguing my favourite recipes and the fact that I have 100 entries now means that I really feel that I have my own “body of work ” of sorts that I can look back on and also share with others.
So, I thought it fitting that I share a pretty special occasion dessert for this little personal milestone! I found this recipe in a gorgeous Gourmet Traveller magazine (um, hello, was that mag created especially for me?) that was in a hotel room on a business trip and knew I had to make it. I just had to find an occasion, which came in the form of a dinner party for some of my new female friends here. I love having people over and entertaining, and of course my favourite part of this is creating the desserts. In my opinion, dinner is just kind of what you have to have before you consume desserts. (Ok not all the time, but you get my drift.)
The best part about this cake is that although multiple steps are involved, almost every part of it can be made before the actual day of your dinner party. Unfortunately, I was very busy at work the week leading up to my dinner so had to make it all the afternoon of the party, when I was also making about 7 other dishes. This resulted in a less than ideal stress situation (and less than ideal photos…sorry), but I pulled it off! I would definitely recommend making the crepes ahead of time though if you are making this for a dinner party and will be making a bunch of other dishes.
Other than the time factor, no part of this cake is really that hard. The chocolate ganache makes a LOT, so you will probably have some leftover that could be drizzled over other cakes or desserts. Make sure that you allow the ganache enough time to set in the fridge. I realise this looks like a lot of steps, but as you can see from the ingredient list, it’s all really quite basic. The cake is just amazing because it has so many “layers” due to the crepes, and the combination of chocolate and salted caramel is of course divine. Obviously this cake is quite indulgent so it’s not a make after dinner on a Tuesday sort of thing, but the leftovers taste fantastic heated up the next day. If you want to really impress without having to buy all sorts of cake decorating tools and such, this is 100% the cake for you!
Chocolate and salted caramel crepe cake (adapted from Gourmet Traveller)
Ingredients
For crepes:
- 250 grams (1 2/3 cups) flour
- 1 tablespoon caster sugar (normal sugar is fine too)
- 600 ml milk
- 3 eggs
- 3 egg yolks
- 40 grams (1/3 stick) butter, melted
For chocolate ganache:
- 500 ml pouring cream
- 500 grams dark chocolate, chopped
For salted caramel:
- 220 grams (1 cup) caster sugar
- 60 grams salted butter – I didn’t have salted so I added extra sea salt
- 125 ml (1/2 cup) pouring cream
- 1 tsp (or more) sea salt
For the chocolate ganache, bring the cream to a boil in a saucepan over medium-high heat. Remove from the heat, add the chocolate, and let stand for 5 minutes. Stir it until it’s smooth (this is incredibly satisfying…seriously, making chocolate ganache is very calming), and then put it in the fridge to set. It should be in the fridge for several (as in 2+) hours. Naturally I did not have enough time and thus put it in the freezer for a bit as well.
Meanwhile, make the crepes batter. In a large bowl, stir together the flour, sugar, and a pinch of salt. Add the milk, eggs and yolks and stir until thoroughly combined. Let the batter rest for 20-30 minutes before adding in the melted butter and stirring well again.
Now: to make the crepes. This is not really that hard as long as you have the right size pan. Make it a circular skillet that is about 20 cm / 8 inches in diameter or if you don’t have that try to get one as close to that size as possible because you will want the crepe to spread out over the entire pan. Spray the pan with non-stick spray and turn to medium-high heat. You can be really scientific and measure out 60 ml of crepe batter to the pan each time or you could be in a massive hurry like I was and tilt what looks like a good amount of batter in and spread it around the pan (just pick up the pan and tilt it till the mixture spreads). Cook until the edges are golden (1-2 minutes), and then flip it and do the same on the other side. I won’t lie – this is tricky and takes a couple crepes to master the technique. However, don’t worry if a crepe has a hole or gets a bit too browned – this is why we smother them in chocolate ganache. When you are done with one crepe, transfer to a plate and put a layer of baking paper over the top. Repeat this process until you are out of batter, separating each crepe from each other with another layer of baking paper. I would re-spray the pan or coat with butter in between every two crepes. If at this stage you are exhausted and have thought ahead enough to make this ahead of time, you can wrap each crepe in plastic wrap and keep in the fridge for up to 2 days.
If you want to soldier on, then line the base of a circular spring-form cake tin with a round of baking paper. If you sadly do not possess a circular spring-form cake tin (which I actually don’t at the moment), you can just put it in a square pan. Put one crepe on the bottom. Spread with a layer of ganache, top with another crepe, and repeat the layering process of crepe ganache crepe etc until all the crepes are used. (I think I may have only had 10 or so? The thinner they are the more there will be.) Finish the stack with a crepe. There should be ganache left over that you will use later. Put in the fridge to set for about an hour.
Last step: caramel sauce. Stir the sugar and 60 ml of water in a saucepan over medium-high heat until the sugar dissolves. Bring to a boil and cook until it becomes caramelised (4-5 minutes). Add the butter, whisk to combine, and then add the cream. Be careful as the mixture may sputter and splatter you. As you are stirring add your sea salt (if you aren’t using salted butter, add a heaping teaspoon as opposed to a normal one). Set the caramel aside.
When you are ready to cook, preheat the oven to 180 C / 350 F and put your assembled crepe cake in for about 10-12 minutes until it’s warm. Transfer to a serving plate, which I assure you is only possible if in fact you are using the springform pan. Do not attempt otherwise. Warm the remaining ganache until it’s drizzling consistency. Drizzle the salted caramel and ganache all over the cake. If you want to get fancy, you could also top with a dollop of whipped cream and/or grated chocolate. Watch the look of awe on your guests faces when you cut the cake, revealing its multiple layers, and revel in the delicious glory of your dish. (yes, this is a necessary last step)
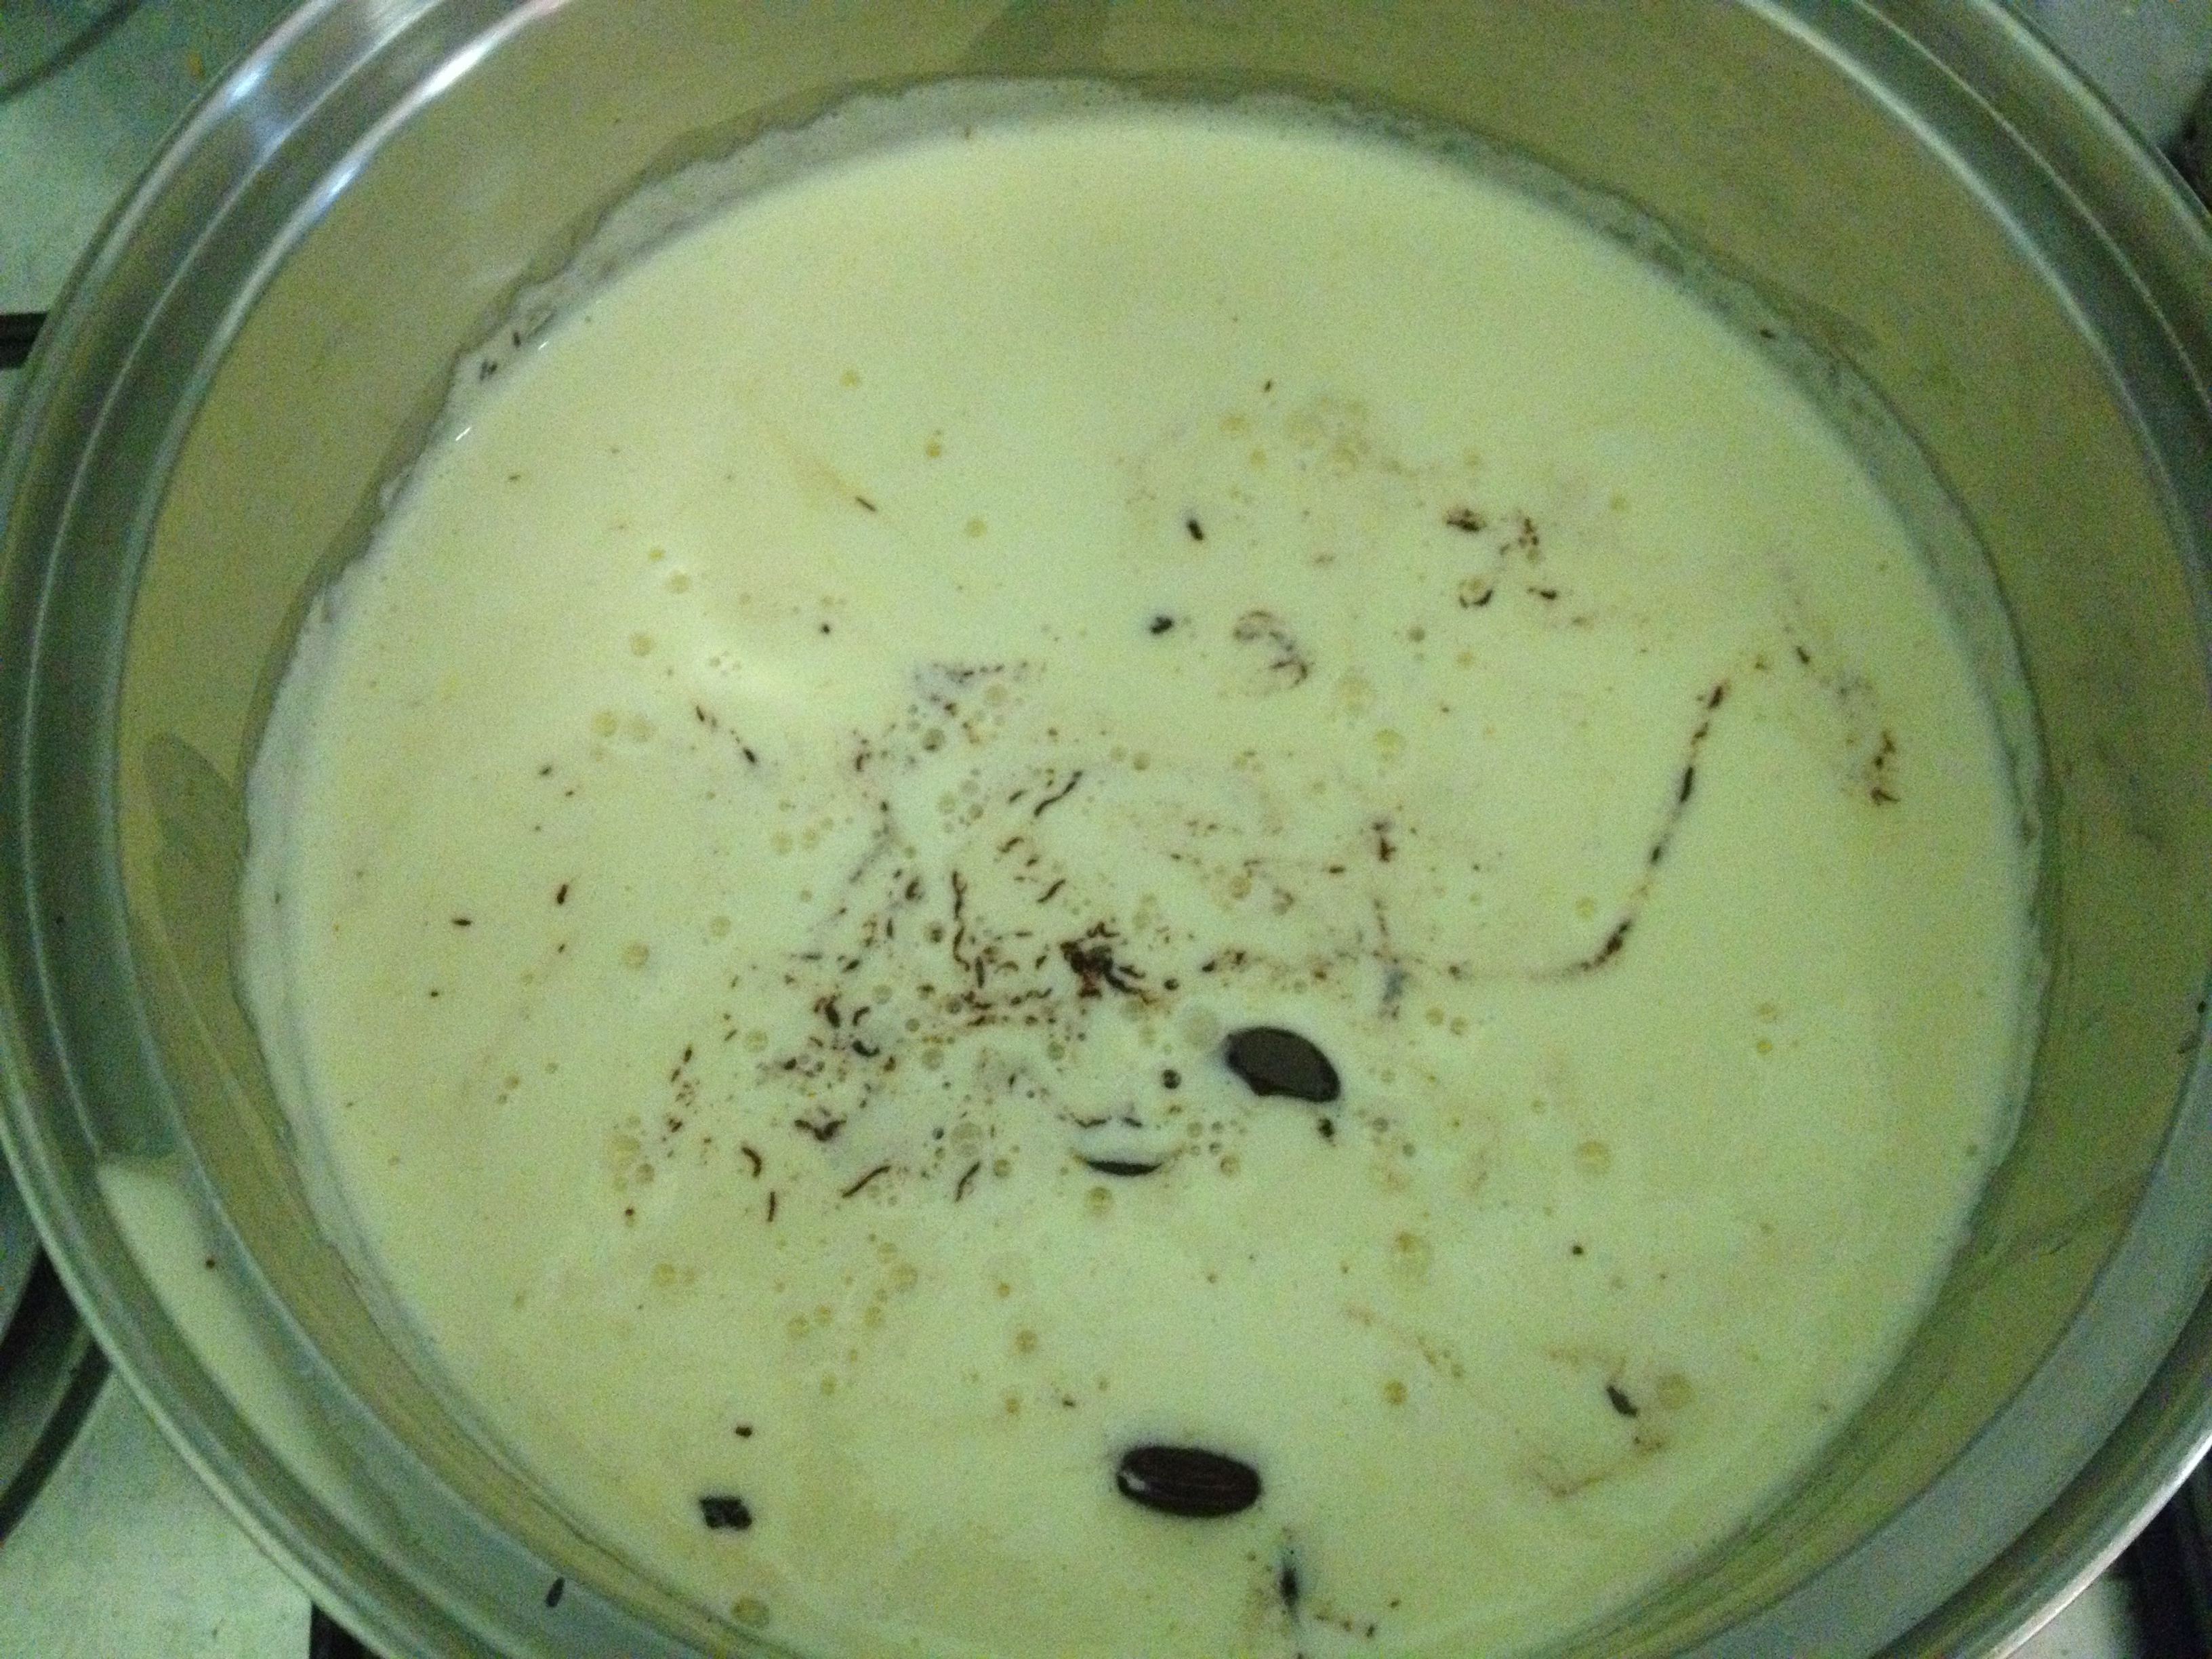 Behold – chocolate ganache before it becomes chocolate ganache. So it’s basically a lot of hot cream and chocolate until you let it sit for a while – then you stir and it magically becomes incredible
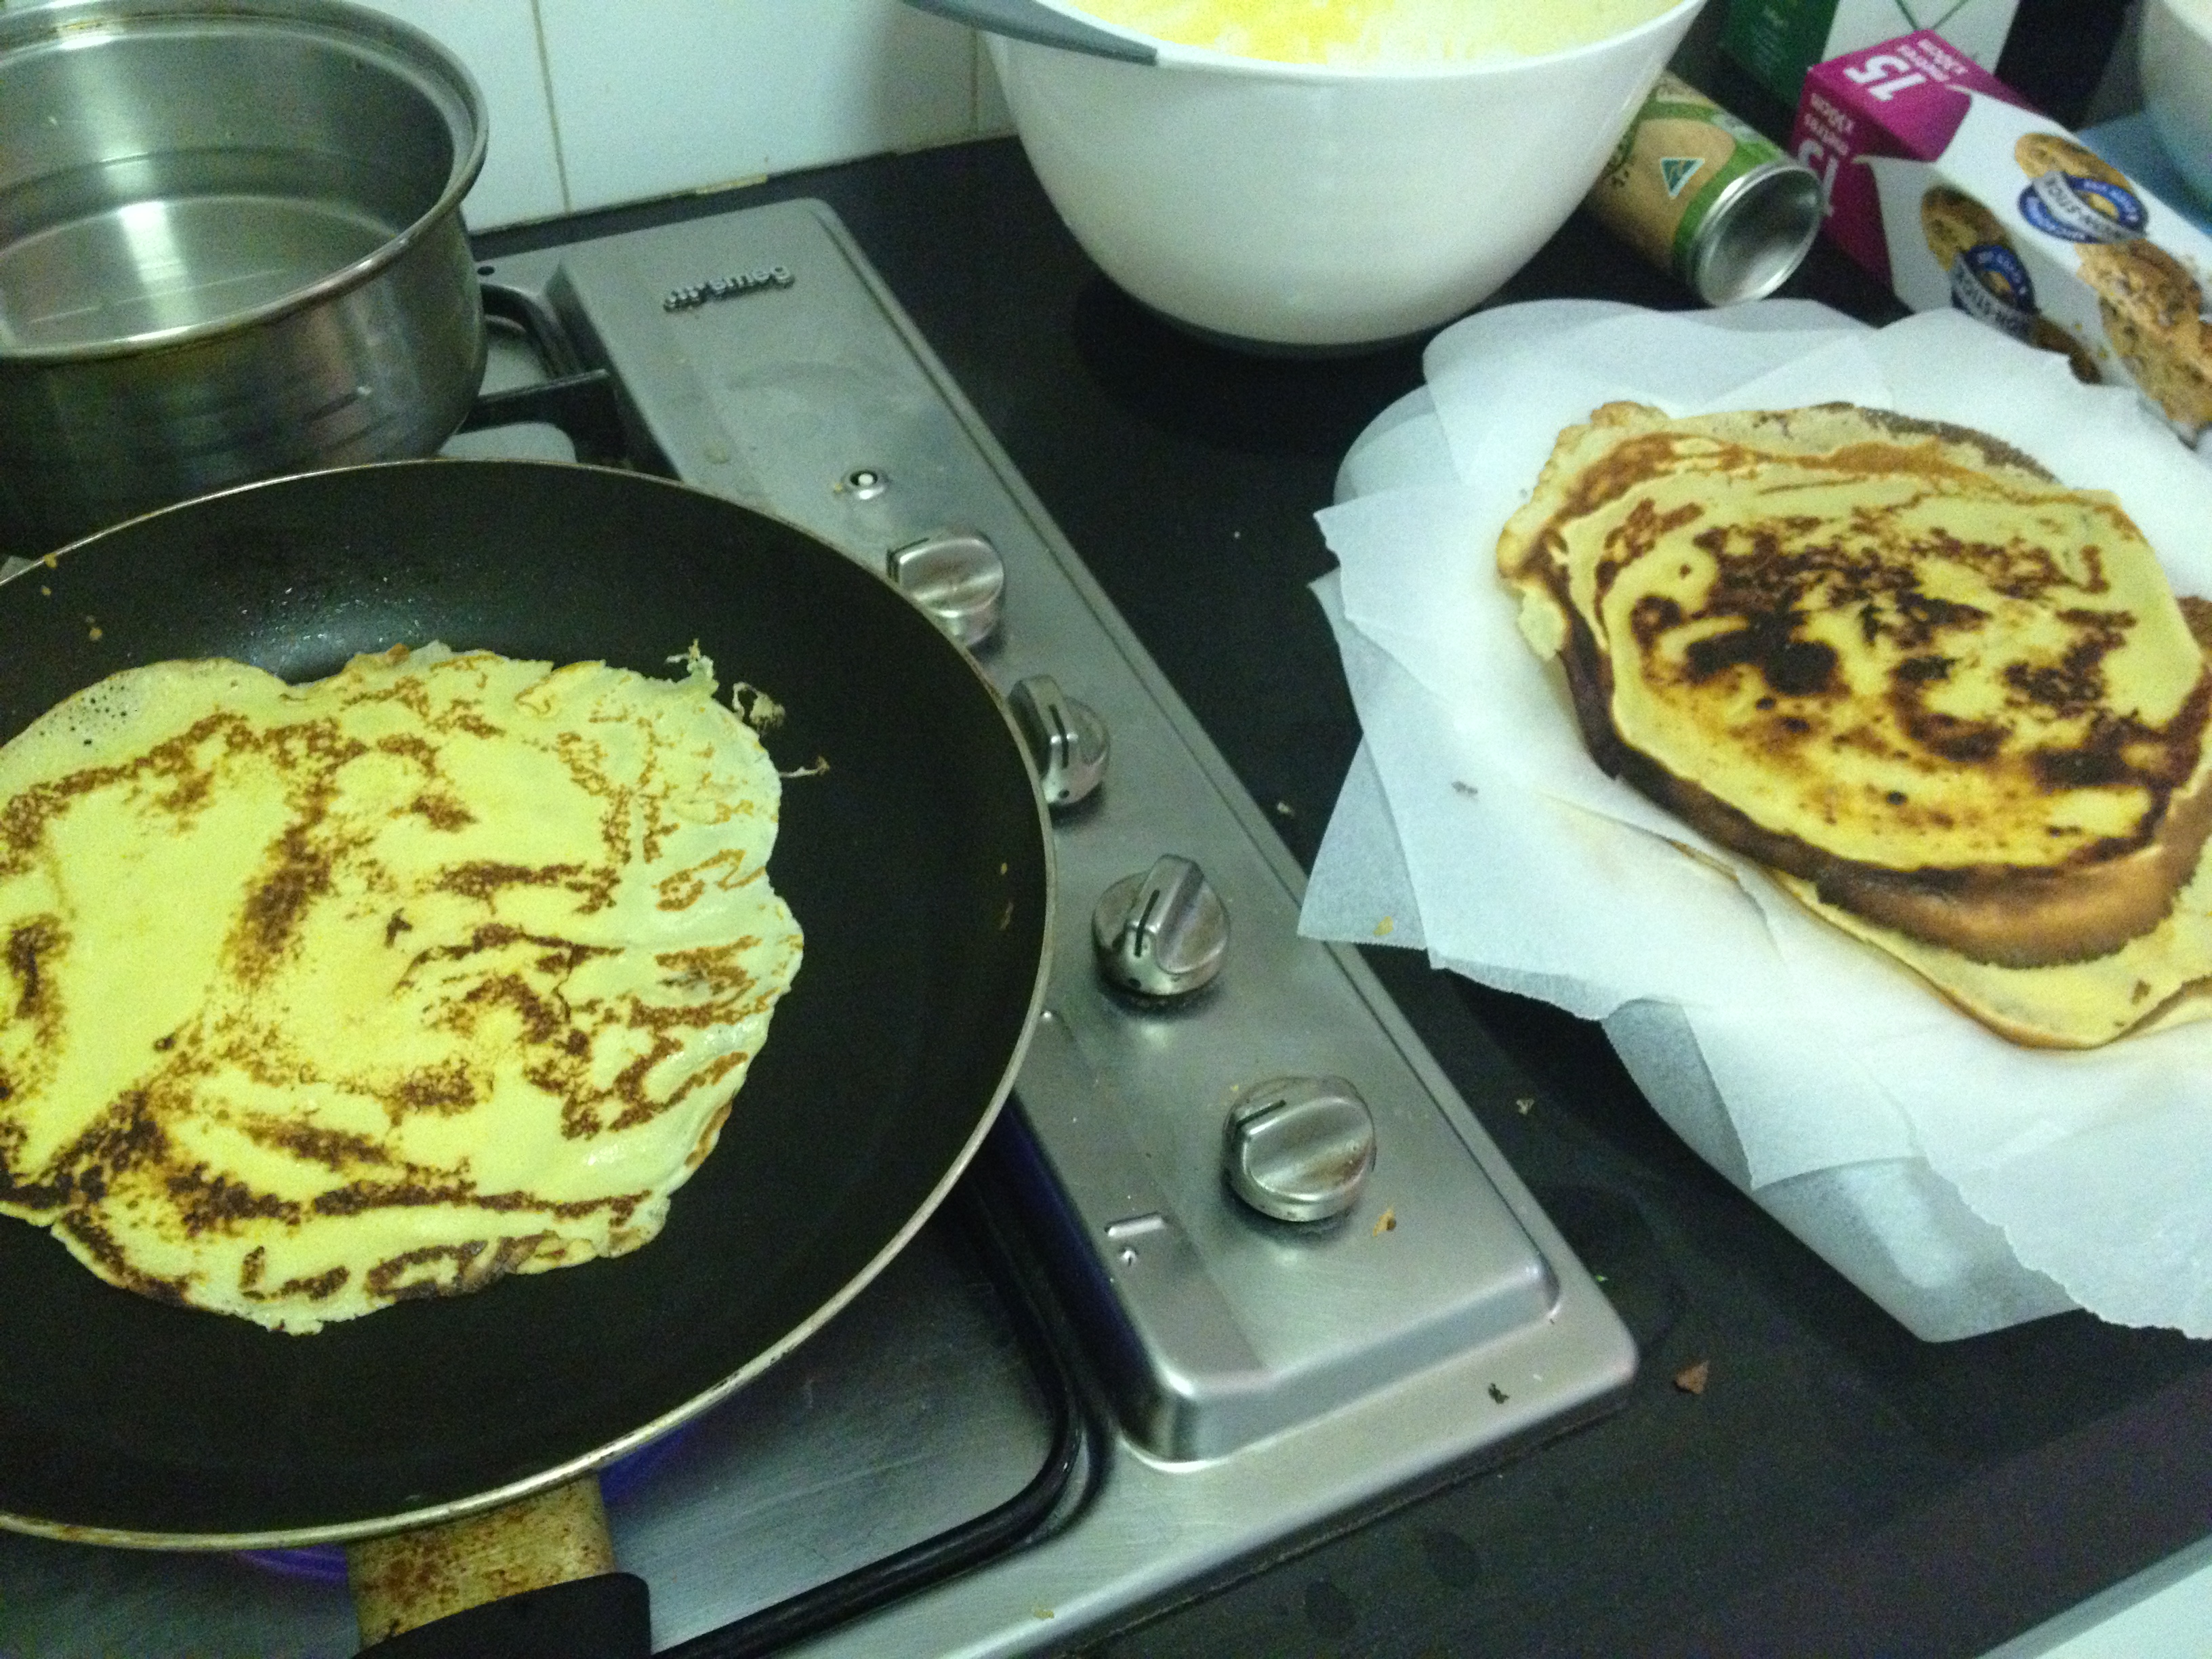 The crepe making process – as you can see, it involves a lot of baking paper. My pan was just a bit too big, but ideally you should get a pan where you can spread the crepe all the way to the edges
 The stacking process. Crepe, chocolate ganache, repeat. As you can see if you don’t do it in a springform pan it is going to be a bit messy. I am pretty tempted to just buy a springform pan solely to make this cake again.
 Finished product with more chocolate ganache and caramel sauce drizzled over it. I do not remember how I was able to do this (dinner party haze of panic), but I guess I somehow transferred the finish product from the square pan to this plate. I wouldn’t recommend this though – you can always just serve it out of whatever you’ve baked it on. Of course with aforementioned springform pan it would tip out onto a serving plate quite nicely. Also, I realise this cake doesn’t look incredibly pretty here, but trust me, that’s just the photography, not how it really is. It would also look far more chic if you put some decorative whipped cream topping on the top of it.
 Ooooh look at the layers! And yes, those other two desserts in the background will also be featured on the blog shortly. When I do dinner parties, I always have to make at least 3 desserts.
This cake was a smash hit. Yes, it’s a bit of a time investment to make, but as I said earlier, basically every part of it can be done ahead of time, so unless you wait till the last minute like I did, it wouldn’t be stressful to make at all. The “wow” factor of the many layers combined with the bittersweet chocolate ganache and salted caramel is seriously a to-die for combination. This is a pretty perfect dinner party dessert and I thought it was fitting that it be shared as my 100th blog post!
Comments
4 Responses to “Chocolate and salted caramel crepe cake”Trackbacks
Check out what others are saying...-
[…] chocolate desserts at the same time (in this case, the dark chocolate pear pistachio cake and the chocolate salted caramel crepe cake) and I know they need to be balanced out. This dessert has two main components which make it a […]
-
[…] extra little step of making your own caramel to put in them? I have made caramel before for the salted caramel chocolate crepe cake, but the process of making this caramel involves just putting sugar in a pot and letting it melt, […]
-
[…] One year ago I was apparently updating this blog far more frequently than I currently am…check a few of these out if you want some recipe ideas: mini spinach and feta frittatas, chewy egg-free brownies, butternut squash galette (which I recently made again for a baby shower!), and the gorgeous chocolate and salted caramel crepe cake […]

YUM! Looks somewhat complicated but majorly delicious!!