Constructing a cake

The occasion was another farewell – this time to one of my favourite people in the Sydney office, and since I am still on a high from being able to have constant access to a kitchen again, I decided I needed to go big. I was asked to go with the theme “Sunshine”, so I decided to make a sun cake. I dove into baking the cake so eagerly that I completely forgot to take photos of it…so while I will include the recipe for the actual cake, my photos are a bit more focused around cake construction.
So firstly, I have to preface this post by saying I really am not a cake baker by any means. I don’t have any of the tools required to make a nice looking cake (leveler, cake stand, frosting bags and piping tips, etc), but I know I can make a delicious one at least. I decided to just go with this awesome cake from Smitten Kitchen (since it’s one of the best food blogs out there) and then just cut it into the shape of a sun, and go with two types of frostings for good measure. It definitely took more time than I expected, but constructing a cake is really fun (if a bit trying at times), and each time I do it I debate actually buying the tools to do it better…but then I go back to baking cookies.
Yellow cake (adapted from Smitten Kitchen)
You can make all sorts of shapes from this – a single sheet cake in a big pan, two square cakes, or two or three round cake layers. I made two round cake layers and one square.
Ingredients
4 cups plus 2 tablespoons (480 grams) of flour
2 tsp baking powder
1 1/2 tsp baking soda
1 tsp table salt
2 sticks (1 cup, 1/2 pound or 225 grams) unsalted butter, softened
2 cups (400 grams) sugar
2 tsp vanilla extract
4 large eggs, at room temperature
2 cups buttermilk (475 ml), well-shaken – I actually did buy buttermilk for this purpose but you really can just use 1 cup of normal milk with 1 tsp of lemon juice stirred in for each cup of buttermilk you need
Preheat oven to 350 F / 180 C. Spray your pans with non-stick spray and line with parchment paper if you have it (makes it easier to remove from the pans). In a large mixing bowl, beat butter and sugar together until pale and fluffy, then beat in vanilla. Add eggs 1 at a time, beating well and scraping down the bowl after each addition. Then add the baking powder, baking soda, salt, and about half the flour. Mix in carefully, and then add the rest of the flour. Finally, stir in the buttermilk slowly until just combined (mixture will look curdled).
Spread the batter evenly in the cake pans. Bake until golden and a wooden pick inserted in center of cake comes out clean, 35 to 40 minutes. Cool in pan on a rack 10 minutes, then run a knife around edge of pan. Invert onto rack and discard parchment, then cool completely, about 1 hour.

Sample cake layer. Yes, it is not a perfect circle. That may or may not be because I felt the need to trim the edges to taste it.
SO. Step 1: done. You can take cake layers, wrap them in foil, and then freeze them for up to several weeks. I highly recommend making your cakes ahead of time if you are also making your own frostings. Having the cake layers in the freezer also makes them way easier to frost later.
I then decided to frost it first with a chocolate fudge frosting. There are a bunch of frostings out there so I just looked a lot of recipes and combined them. You can either use cocoa or melted chocolate – a simpler buttercream typically just calls for cocoa but I decided to use chocolate since that was what I had on hand.
Chocolate fudge frosting
Ingredients (this should make enough to frost 2 of the circles at least)
- 1/3 cup (75 g) butter
- 1 cup dark chocolate chips
- 1/4 teaspoon salt
- 1 measuring tsp. vanilla extract
- 3 cup. sifted confectioners’ sugar
-
5 tbsp milk (give or take)
In a small saucepan, melt butter and chocolate together. Or if you are like me you can melt it in the microwave. Meanwhile, heat the milk in a saucepan, and once it’s hot and about to boil, add 1 cup of the confectioners sugar and remove from the heat. Obviously this will make somewhat of a paste. Then pour in the vanilla extract, add the salt, and add all the melted chocolate. Then add the rest of the confectioners’ sugar gradually until it’s spreadable consistency – you may not need it all.
 Melted chocolate and the milk sugar paste (yum yum)
 Frosting when more sugar is added – I kept mine a bit liquid-y so it could flow down the sides of the cake, but then it hardened quite nicely
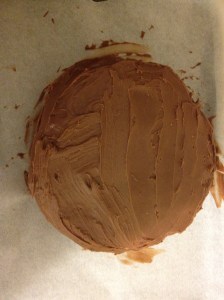 Frosted cake
You could easily add some garnishes of chocolate chips or sprinkles and finish there, or you could let it set in the fridge and then frost it with a buttercream after that, which is what I did. The best buttercreams in my opinion are the ones made with egg whites, but they can be a bit tricky so again I just went for a combination of various simple recipes I’ve seen.
Basic buttercream
Ingredients (whenever I make frosting I find I always have too much, but that’s fine since that makes it easier to frost the cake – this should definitely make enough)
2 sticks (225 g) butter at room temperature
1 tbsp vanilla extract
3 cups of powdered sugar
1/4 cup milk
Cream the butter until fluffy and pale. (Obviously, it should be quite softened.) Then add the vanilla extract. Finally, start adding the sugar about a half cup at a time, alternating it with a splash of milk. Once you’ve done this a few times, you can add in food colouring to your desire, or split it out into two bowls if you want multiple colours. The best thing about buttercream is it’s very versatile and thus can be made multiple colours and put on multiple things. The worst thing about it is that it’s just terribly bad for you. I mean, pure butter and sugar? Ew. And yet it tastes so good on the cake.
Anyway, once you have a spreadable consistency you are ready to frost your cake. This is not a blog to tell you exactly how to do this – I typically drop several large spoonfuls in the center of the cake and just start spreading with a knife or a soft rubber spatula. Good luck.
 Butter, sugar, and vanilla extract
 The mess that happens when milk is added and it’s still lumpy…
 But as you continue to stir, it gets smooth! And I added a bunch of yellow food colouring too.
 Amazingly smooth final product.
 I used the square cake pan to cut it into lots of little rectangular pieces and then stacked those to be the rays of the sun
 This is a forgiving frosting. You can use it to cover up all sorts of imperfections on the cake itself.
Yes, baking a cake can be quite time consuming, but I still highly recommend it (and you don’t always have to make your own frosting). Honestly, the cake baking part is by far the easiest and barely takes any time at all – making the frosting and constructing the cake is typically the challenge. If you want to start out with a great cake, definitely sample this recipe and then maybe take one of the frostings and try it out on the cake. It’s great for pleasing a crowd!

Comments
One Response to “Constructing a cake”Trackbacks
Check out what others are saying...[…] One year ago: Yellow cake and assorted frostings […]